Free SSL Certificate on Nginx

Nginx webszerver SSL-el nem fizetős certificate felkonfigurálása. Certificate Certbot rendszerrel.
http: > https:
How to configure Free SSL Certificate on Nginx using Certbot!
Sajnos a legtöbb web hosting szerver a 360 napos SSL elérést lerövidítette 200 napra, tehát ez is megdrágult.
Nginx webszerver Linux-ra installálása és konfigurációját már a blogomban volt róla szó, már leírtam, itt rövidítve újra írom:

Előszőr Szerver frissítése:
sudo apt-get update && sudo apt-get upgrade -y
Utána, ha szerven nincs fent az Nginx webszerver, intallálni szükséges:
sudo apt-get install nginx -y
Nginx installáció után sikerült-e ellenőrizése root jogosúltsággal:
nginx -t
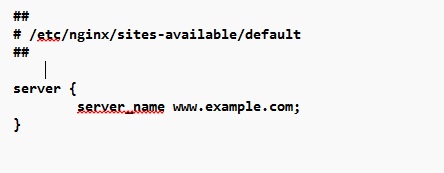
cd /etc/nginx/sites-available/default fálj ha nincs hozzad létre, és 
nano default
Írjad a text fájlba:
www.example.com egy teszt domian név, ide kell írnod a saját domain nevedet.
újra:
sudo nginx -t
Majd a végén:
sudo systemctl restart nginx
Fut a nginx webszerver!

nginx-default

Encrypt Certbot installációja következik.

sudo apt-get install certbot

Majd certbot nginx plugont felinstalláljuk:

sudo apt-get install python3-certbot-nginx

A végén a saját domaineddel a certbot-ot elindítjuk:

sudo certbot --nginx -d example.com -d www.example.com

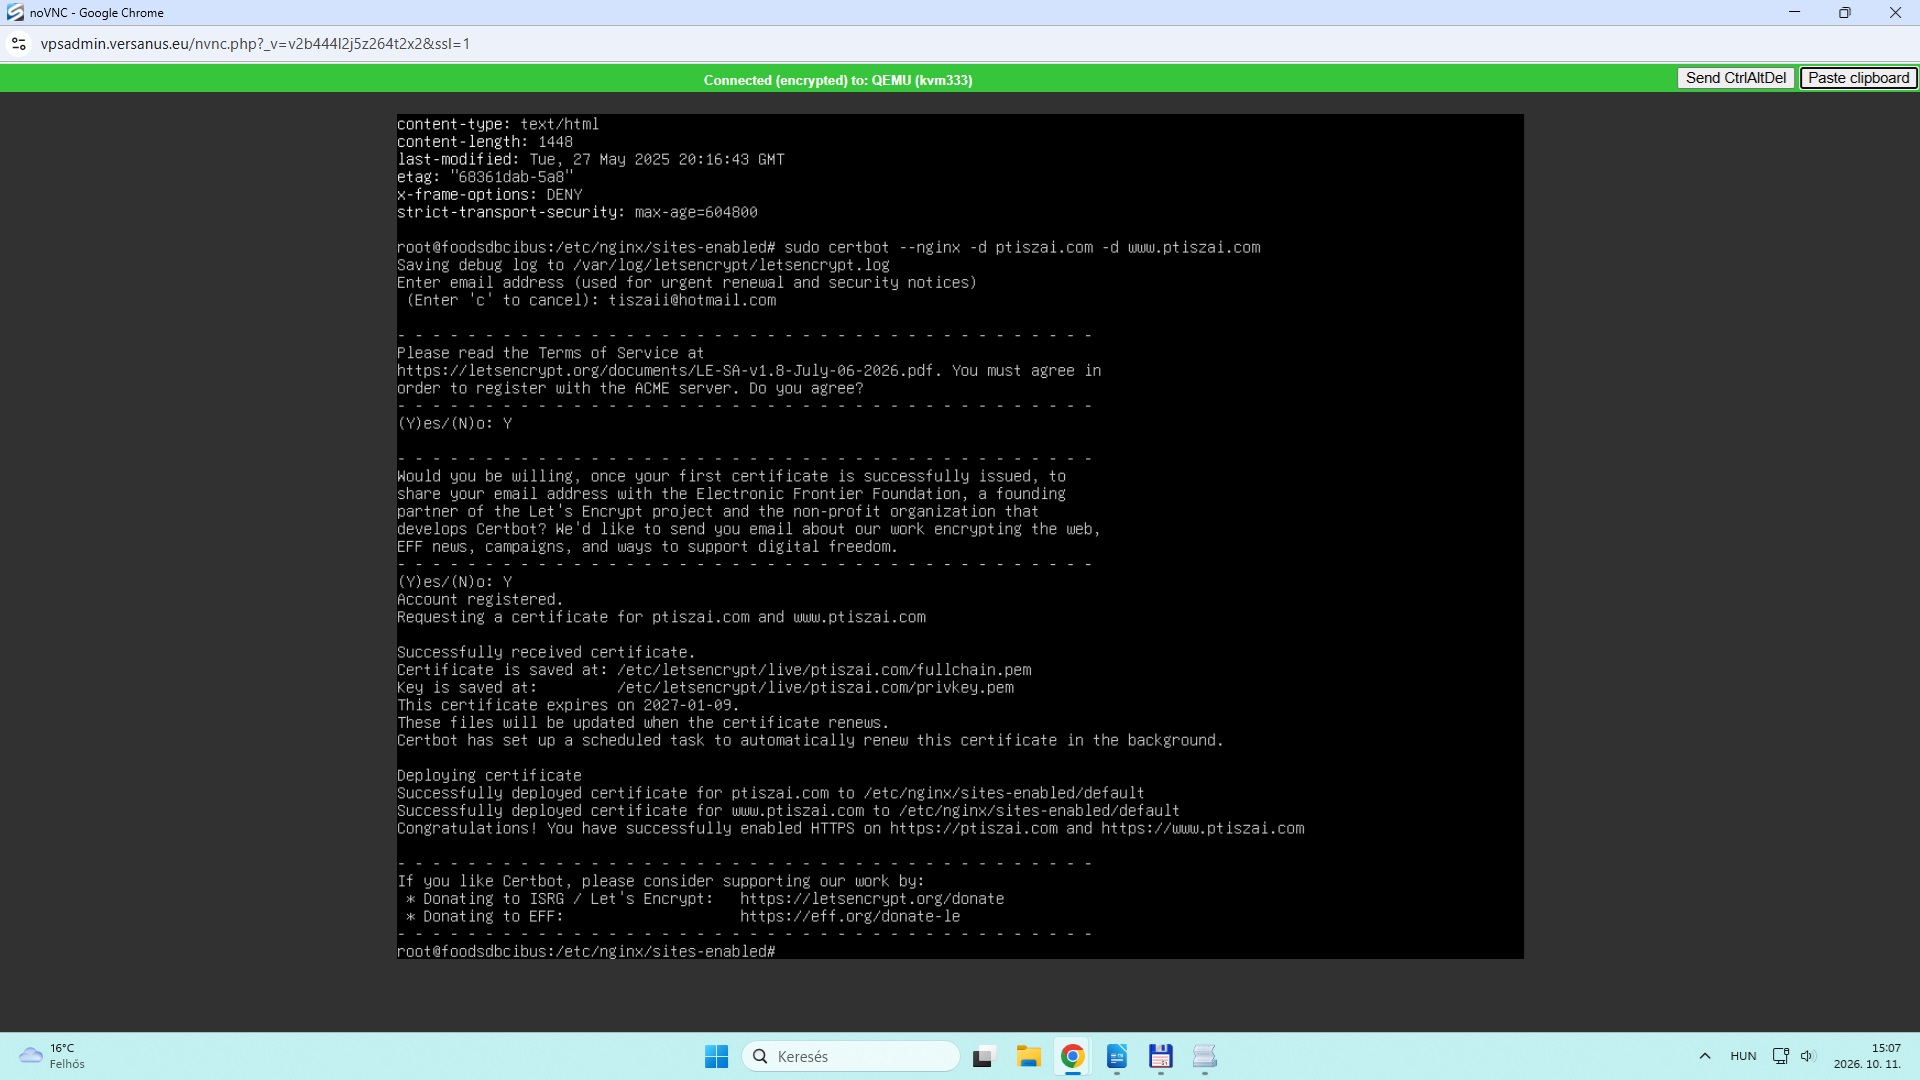
Eredmény látható, csak annyi ehhez a képhez, a www.example.com helyett a www.ptiszai.com-on futtattam
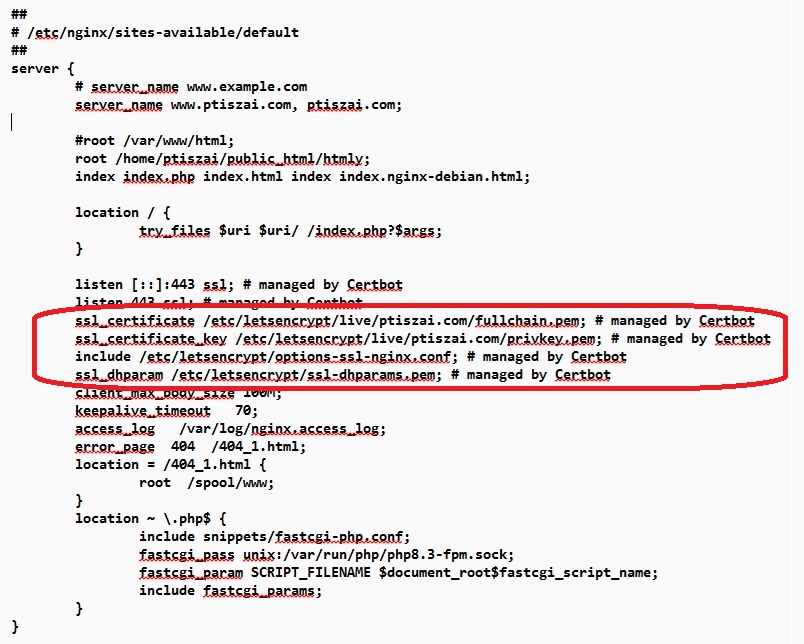
certbot-ptiszai A default fájl ptiszai.com alatt, www.example.hu átirtam futtatás elött: nginx-default-full nginx webszerver újabb test és indítása:

sudo nginx -t
sudo systemctl restart nginx

Kész, fut a webszerver.
Test Domain SSL Certificate

https://www.ssllabs.com/ssltest/analyze.html?d=www.ptiszai.com

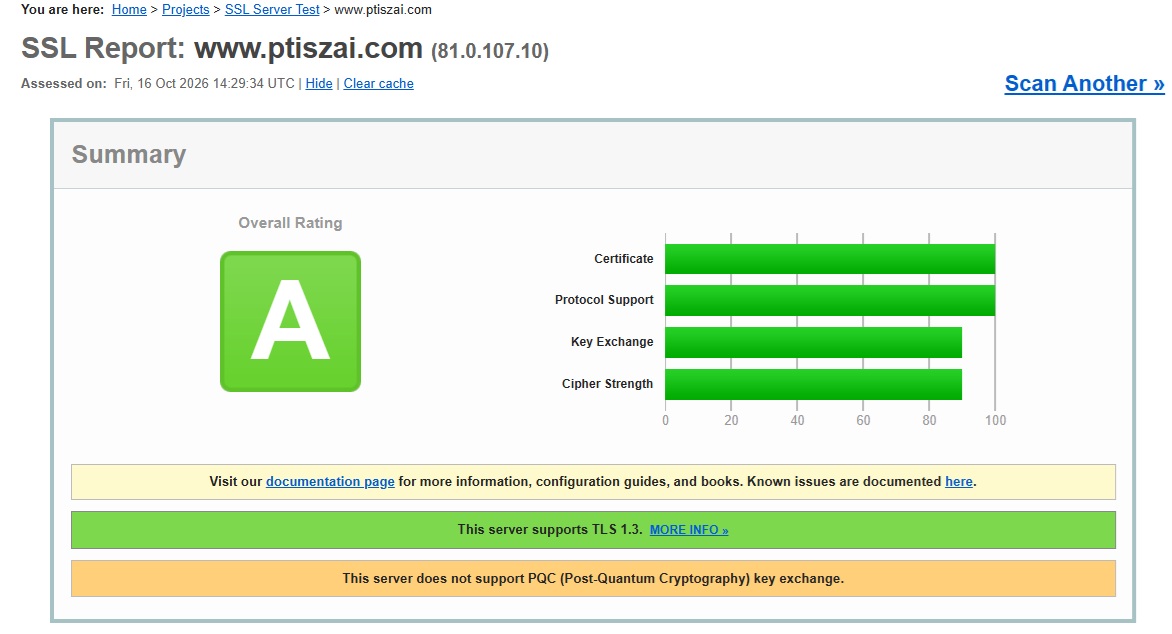
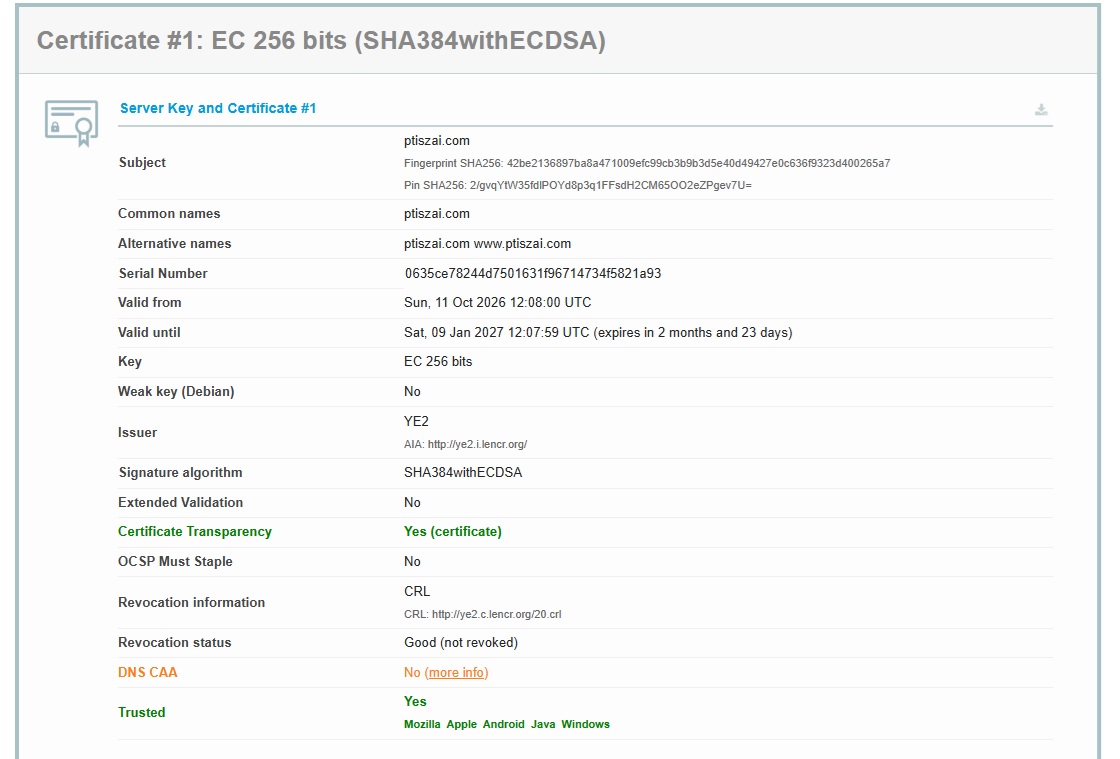
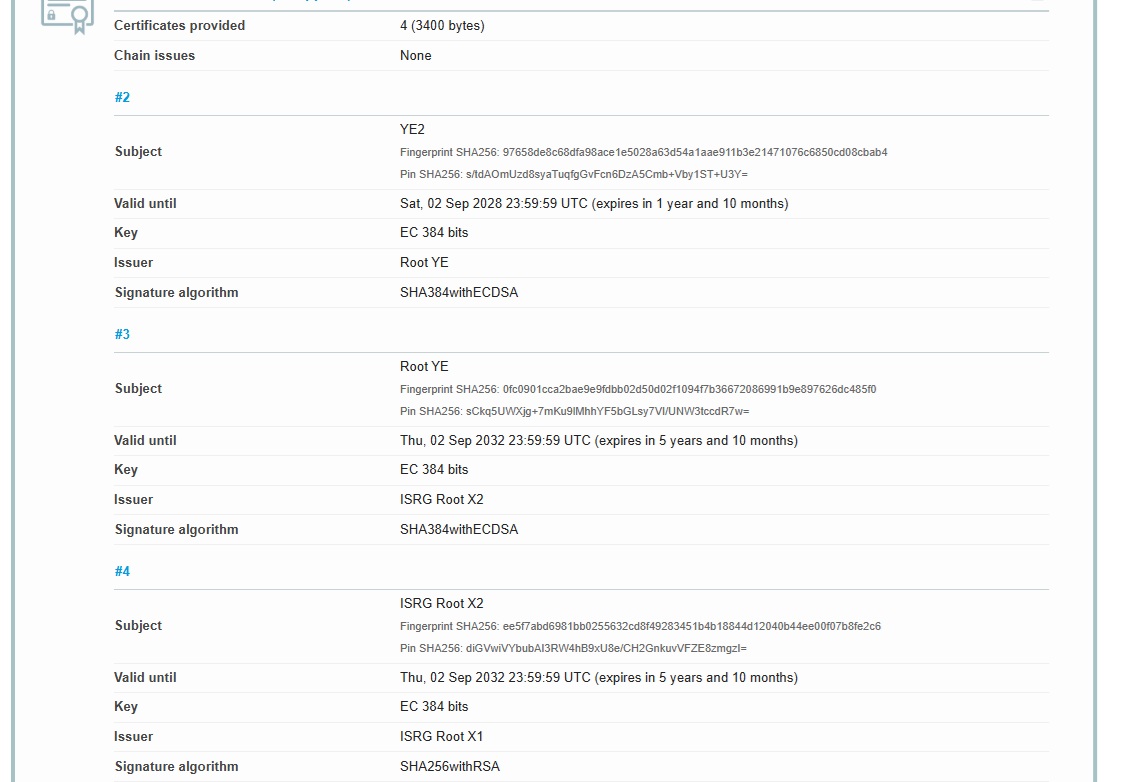
A ssltest honlapon lehet tesztelni és ellenőrizhetet a hitelességet.
A ptiszai.com web- honlapom domainre a válasz:
ssllabs1
ssllabs2
ssllabs3
Minden jó, happy!

Angol hang videó angol és magyar szöveges kijelzése (verzió 2.)

Angol nyelvő videóknak a problémái, nem mindegyiknél írja ki az elmondott angol szöveget, és nincs lefordítva magyar nyelvre.
Készítettem erre egy két nyelvű feliratozott videót.
A felirat megjelenik a videó alján két sorban fekete háttérben angol felirat fehér karakterrel, magyar felirat sárga karakterrel íródik ki .
Első kőrben el kell dönteni milyen folyamatok kellenek hozzá, és milyen eszközökkel oldanád meg.
Eszközök, program környezet kialakítása:
1.) kell egy angol nyelvű videó, amit youtube videó szerveren keresel, ehhez youtube Premium fizetős verzió kell, ennek a költsége havi 2000-3000 Ft.:
youtube
2.) kell egy STT (Speech To Text) hangot szöveg fájlba konvertálja, ez AI model.
whisper OpenAI
Githup-on jobb oldalt a zöld alapon "<> Code" -> "Download ZIP", vagy

git clone https://github.com/ggml-org/whisper.cpp
cd whisper.cpp
cd models
sh download-ggml-model.sh base.en
sh download-ggml-model.sh small.en
sh download-ggml-model.sh medium.en

3.) kell egy angolról magyarra fordító applikáció.
Én Google Fordító-t használtam, jó tudsz angol nyelven, mert biztos kelleni fog egy kis nyelvi javítás a szövegben.:
Google Fordító
4.) FFmpeg windows változatú program letőltése innen:
FFmpeg letöltés
Nálam az utolsó verzió: 2026-07-09.
FFmpeg fokumentáció
Könyvtár stuktúrám:

c:\Users\HP\work\ffmpeg\2026-07-09-full\*
c:\Users\HP\work\ffmpeg\TextEN-HULogoToVideo\video1\*

Folyamatokat script formában bemásolom, nem magyarázom el.
FFmpeg leírás forrását megadtam
1.) videó fájl összes stream képkockára felrakja a FFmpeg program logóját:

FFmpeg logo
TextLogo.bat:

..\\..\\2026-07-09-full\bin\ffmpeg -i "Most Simple Explanation of General Theory of Relativity.mkv"  -i ffmpeg_logo64.png ^
-filter_complex ^
"[1]scale=32:16,format=yuva444p[in2];[0][in2]overlay=20:20"   ^
"Most Simple Explanation of General Theory of RelativityLogo.mkv"

2.) videó stream fájl hangját egy fájlba konvertálja:
Txt_english.bat:

..\\..\\2026-07-09-full\\bin\\ffmpeg -i "Most Simple Explanation of General Theory of Relativity.mkv" -vn ^
-af ^
"whisper=model='..\\..\\SpeechAIToText\\whisper.cpp\\models\\ggml-medium.en.bin':language=en:queue=10:destination=ArduinoBasics-medium.txt:format=txt:use_gpu=true" -f null -

Eredmény ArduinoBasics-medium.txt fájlban lesz:

-For over 200 years, the world of physics was dominated by the ideas of Sir Isaac Newton.
-Back in 1687, Newton wrote a book called "Mathematical Principles of Natural Philosophy".
-In that book, he described how everything in the universe moves, thanks to three laws of motion and a law of gravity. 
-According to Newton, everything in the universe pulls on everything else. 
-The larger the mass, the stronger the pull. 
-That pull is what we call gravity.
...

3.) eredmény ArduinoBasics-medium.txt fájl tartalmát lefordítom magyarra a Google Fordítóval, és javítok a szövegen
4.) ahhoz, hogy a videó stream fájl egyes képeire kiírja az angol és magyar képi szöveget, ahogy az angol hang mondja, ezt időzíteni kell!
Az FFmpeg sendcmd=f=sendcmd.txt parnacs fájt használja, nem írom le,
az FFmpeg dokumentációban megtalálod.
sendcmd.txt:

0.0-6.0 [enter] Parsed_drawtext_1 reinit 'x=(w-text_w)/2:y=h-130:text=For over 200 years, the world of physics was dominated by the ideas of Sir Isaac Newton.',
                 Parsed_drawtext_2 reinit 'x=(w-text_w)/2:y=h-90:text=Több mint 200 éven át a fizika világát Sir Isaac Newton gondolatai uralták.';
6.5-14.0 [enter]  Parsed_drawtext_1 reinit 'text=Back in 1687, Newton wrote a book called \"Mathematical Principles of Natural Philosophy\"', 
                 Parsed_drawtext_2 reinit 'text=1687-ben Newton megírta \„A természetfilozófia matematikai alapelvei” című könyvét\".';
14.5-22.0 [enter] Parsed_drawtext_1 reinit 'text=In that book, he described how everything in the universe moves, thanks to three laws of of motion and a law of gravity.',
                 Parsed_drawtext_2 reinit 'text=A könyvben leírta, hogyan mozog minden a világegyetemben, a mozgás három törvényének és a gravitáció törvényének köszönhetően.';
22.5-27.0 [enter] Parsed_drawtext_1 reinit 'text=According to Newton, everything in the universe pulls on everything else.',
                 Parsed_drawtext_2 reinit 'text=Newton szerint a világegyetemben minden vonz mindent egymásra.';
27.5-30.0 [enter] Parsed_drawtext_1 reinit 'text=The larger the mass, the stronger the pull.',
                 Parsed_drawtext_2 reinit 'text=Minél nagyobb a tömeg, annál erősebb a húzóerő.';
30.5-34.0 [enter] Parsed_drawtext_1 reinit 'text=That pull is what we call gravity.',
                 Parsed_drawtext_2 reinit 'text=Ezt a vonzást nevezzük gravitációnak.';
34.5-40.0 [enter] Parsed_drawtext_1 reinit 'text=Newton`s ideas explained a lot. They told us why apples fall to the ground.',
                 Parsed_drawtext_2 reinit 'text=Newton gondolatai sok mindent megmagyaráztak. Megmondták, miért esnek a földre az almák.';
...

5.) videó stream egyes képeire ráhelyezi a sendcmd.txt fájl tartamát
két sorban, felső sor az angol az alatta lévő magyar szöveg lesz.
TextSendcmd.bat:

..\\..\\2026-07-02-full\\bin\ffmpeg -y -i "Most Simple Explanation of General Theory of RelativityLogo.mkv" -vf sendcmd=f=sendcmd.txt,^
drawtext=fontfile=Montserrat-Bold.ttf:fontsize=28:fontcolor=white@1.0:box=1:boxcolor=black@1.0:boxborderw=6:line_spacing=0:text='',^
drawtext=fontfile=Montserrat-SemiBold.ttf:fontsize=28:fontcolor=yellow@1.0:box=1:boxcolor=black@1.0:boxborderw=6:line_spacing=0:text='' ^
"Most Simple Explanation of General Theory of Relativity EN-HU.mkv"

Eredményt a Most Simple Explanation of General Theory of Relativity EN-HU.mkv videó fájt elindítom a VCL médialejátszóval:
videolan
Vége.

Angol hang videó angol és magyar szöveges kijelzése (verzió 1.)

Angol nyelvő videóknak a problémái, nem mindegyiknél írja ki az elmondott angol szöveget, és nincs lefordítva magyar nyelvre.
Készítettem erre egy két nyelvű feliratozott videót.
A felirat megjelenik a videó alján két sorban fekete háttérben fehér karakterrel. Első kőrben el kell dönteni milyen folyamatok kellenek hozzá, és milyen eszközökkel oldanád meg.
Eszközök, program környezet kialakítása:
1.) kell egy angol nyelvű videó, amit youtube videó szerveren keresel, ehhez youtube Premium fizetős verzió kell, ennek a költsége havi 2000-3000 Ft.:
youtube
2.) kell egy STT (Speech To Text) hangot szöveg fájlba konvertálja, ez AI model.
whisper OpenAI
Githup-on jobb oldalt a zöld alapon "<> Code" -> "Download ZIP", vagy

git clone https://github.com/ggml-org/whisper.cpp
cd whisper.cpp
cd models
sh download-ggml-model.sh base.en
sh download-ggml-model.sh small.en
sh download-ggml-model.sh medium.en

3.) kell egy angolról magyarra fordító applikáció.
Én Google Fordító-t használtam, jó tudsz angol nyelven, mert biztos kelleni fog egy kis nyelvi javítás a szövegben.:
Google Fordító
4.) FFmpeg windows változatú program letőltése innen:
FFmpeg letöltés
Nálam az utolós verzió: 2026-07-09.
FFmpeg fokumentáció
Könyvtár stuktúrám:

c:\Users\HP\work\ffmpeg\2026-07-09-full\*
c:\Users\HP\work\ffmpeg\TextEN-HULogoToVideo\video1\*

Folyamatokat script formában bemásolom, nem magyarázom el.
FFmpeg leírás forrását megadtam
1.) videó fájl összes stream képkockára felrakja a FFmpeg program logóját:

FFmpeg logo
TextLogo.bat:

..\\..\\2026-07-09-full\bin\ffmpeg -i ArduinoBasicsforBeginnersBreadboardLEDBuzzerServo.mp4 -i ffmpeg_logo64.png ^
-filter_complex ^
"[1]scale=32:16,format=yuva444p[in2];[0][in2]overlay=20:20" ArduinoBasicsforBeginnersBreadboardLEDBuzzerServoLogo.mkv

2.) videó stream fájl hangját egy fájlba konvertálja:
Txt_english.bat:

..\\..\\2026-07-09-full\\bin\\ffmpeg -i ArduinoBasicsforBeginnersBreadboardLEDBuzzerServo.mp4 -vn ^
-af ^
"whisper=model='..\\..\\SpeechAIToText\\whisper.cpp\\models\\ggml-medium.en.bin':language=en:queue=10:destination=ArduinoBasics-medium.txt:format=txt:use_gpu=true" -f null -

Eredmény ArduinoBasics-medium.txt fájlban lesz:

Imagine a sliding door opening as you approach,
or a homemade radar scanner sweeping a room that stops dead when it spots an object.
exactly do all these separate pieces, the motors, the lights, the sensors, know how
to talk to each other and operate perfectly on cue? The answer is yes.
is usually a tiny blue board called an Arduino. 
This board is a microcontroller,
a specialized mini computer designed to handle specific
basic tasks. 
You can think of it as the conductor of an electronic orchestra. A conductor standing
alone on a stage doesn't make any sound, but if you give...
If that conductor musicians, your physical components, and a piece of sheet music, your
computer code, they can orchestrate complex interactions.
Arduino is a bridge. 
It takes the ideas in your head and translates them into physical,
interactive machines you can actually touch. Let's look at the physical board.
If you ignore the complex looking metal shapes in the middle, you'll notice rows of small holes running along the outer edges.
These highlighted rows are called "tiles".
pins. They are the only way our conductor can communicate with the outside world.
First, there are input pins. You can see here how the signal flows from an external
button into the board. 
This is how the Arduino listens to the world, waiting to
see if a button is pressed or checking the current temperature. 
Then we have output pins.
Notice how the arrow now flows away from the board to light up a bulb.
This is how the Arduino commands the world, sending out electricity to turn on a light or spin a motor.
To use these pins, the Arduino speaks two different languages.
The first is digital. A digital signal is either entirely on or entirely off. It works.
It works like the standard light switch on your wall.
The second language is analog.
Instead of just on or off, analog deals with a continuous range of values.
-functions like a sliding dimmer switch, where you can set a light to 10%, 50%, or anywhere in between.
These pins are the foundation.
how they handle signals, you have the interface to send data and receive a
physical response. To write our sheet music, we use a free program called the Arduino
IDE. The language we type into it is a simplified version of C++. A single program for the Arduino
is called a sketch. To make a sketch work, you need to use the code "skech" to make a sketch work.
you only need to understand two main sections, the setup and the loop. Here is
the setup block. 
Any instructions you put in here will run exactly one time.when the board turns on. 
This is where you organize the stage, like telling the Arduino that pin #13 will be an output. 
Once the setup is done, the program moves to the loop. 
As you can see by this circular path, this is the actual performance. 
Any instructions placed inside the loop will repeat over and over again until the power is complete.
To make a light blink, we place an instruction inside the loop telling the board to send electricity to pin 13 to turn the light on.
Next,we`ll use the power supply to turn the light on. we tell the board to wait for one second,then tell it to turn the light off and wait one more second.
After that last step,the loop simply starts right back at the top. and the light comes on again. 
Coding in Arduino is simply about giving your conductor a list of clear chronological instructions to follow forever. 
With the code we have written, you click the upload button on your computer.
The instructions travel down a USB cable and are stored directly in the Arduino's brain.
The second that upload finishes--
the board springs to life, and the tiny built-in light on the board starts to flash on and off, keeping the exact rhythm of your code. 
To build larger projects, you connect the Arduino to external components using jumper wires and a breadboard.
This grid makes it easy to plug in larger lights, motors, and buzzers to your pins.
That reaction speed game from earlier works the same way.
It reads an input from a player's button, waits for the code to process the timing, and then triggers an output to ring the code. a buzzer. 
Building custom electronics doesn't require an engineering degree. 
All it takes is a basic starter kit, a digital conductor, and the curiosity to tell it what to do. 
next.

3.) eredmény ArduinoBasics-medium.txt fájl tartalmát lefordítom magyarra a Google Fordítóval, és javítok a szövegen
4.) ahhoz, hogy a videó stream fájl egyes képeire kiírja az angol és magyar képi szöveget, ahogy az angol hang mondja, ezt időzíteni kell!
Az FFmpeg sendcmd=f=sendcmd.txt parnacs fájt használja, nem írom le,
az FFmpeg dokumentációban megtalálod.
sendcmd.txt:

0.0-7.0 [enter] drawtext reinit 'x=(w-text_w)/2:y=h-150:text=Imagine 1 a sliding door opening as you approach, or a homemade radar scanner sweeping a room that stops dead when it spots an object.
Képzelj el egy tolóajtót, amely közeledtével kinyílik, vagy egy házilag készített radarszkennert, amely átfésüli a szobát, majd hirtelen megáll, 
amikor egy tárgyat észlel.';
8.0-16.0 [enter] drawtext reinit 'text=exactly do all these separate pieces, the motors, the lights, the sensors, know how
pontosan megcsinálod ezeket a különálló alkatrészeket, a motorokat, a lámpákat, az érzékelők tudják, hogyan';
16.5-20.5 [enter] drawtext reinit 'text=to talk to each other and operate perfectly on cue? The answer is yes.
hogy beszéljenek egymással és tökéletesen cselekedjenek, csak úgy, ahogy kellene? A válasz igen.';
21.5-24.0 [enter] drawtext reinit 'text=is usually a tiny blue board called an Arduino.
általában egy apró kék kártya, amit Arduinonak hívnak.';
24.5-32.0 [enter] drawtext reinit 'text=This board is a microcontroller, a specialized mini computer designed to handle specific basic tasks
Ez a kártya egy mikrokontroller, egy speciális mini számítógép, amelyet bizonyos alapvető feladatok elvégzésére terveztek.';
33.5-35.0 [enter] drawtext reinit 'text=You can think of it as the conductor of an electronic orchestra.
Úgy is elképzelheted, mint egy elektronikus zenekar karmesterét.';
35.5-40.0 [enter] drawtext reinit 'text=A conductor standing alone on a stage doesn`t make any sound, but if you give...
Egy karmester, aki egyedül áll a színpadon, nem ad ki hangot, de ha odafigyelsz rá...';
39.5-50.0 [enter] drawtext reinit 'text=If that conductor musicians, your physical components, and a piece of sheet music, your computer code, they can orchestrate complex interactions.
Ha ez a karmester zenészeket, a fizikai alkatrészeid és egy kotta, a számítógépes kódod, akkor összetett interakciókat tudnak létrehozni.';
50.0-52.0 [enter] drawtext reinit 'text=Arduino is a bridge.
Az Arduino egy "híd".';
52.5-58.0 [enter] drawtext reinit 'text=It takes the ideas in your head and translates them into physical, interactive machines you can actually touch.
A fejedben lévő ötleteket fizikai, interaktív gépekké alakítja, amelyeket ténylegesen meg lehet érinteni.';
58.5-60.0 [enter] drawtext reinit 'text=Let`s look at the physical board.
Nézzük meg a fizikai kártyát.';
60.5-65.0 [enter] drawtext reinit 'text=If you ignore the complex looking metal shapes in the middle, you`ll notice rows of small holes running along the outer edges.
Ha figyelmen kívül hagyjuk a középen látható összetett fémformákat, akkor apró lyukak sorait fogjuk észrevenni a külső szélek mentén.';
65.5-69.0 [enter] drawtext reinit 'text=These highlighted rows are called "tiles".
Ezeket a kiemelt sorokat "csempéknek" nevezzük.';
69.5-74.0 [enter] drawtext reinit 'text=They are the only way our conductor can communicate with the outside world.
Csak ők tudnak kommunikálni a karmesterünkkel a külvilággal.';
74.5-81.0 [enter] drawtext reinit 'text=First, there are input pins. You can see here how the signal flows from an external button into the board.
Először is, vannak bemeneti lábak. Itt látható, hogyan áramlik a jel egy külső gombból a panelbe/kártyába.';
81.5-87.0 [enter] drawtext reinit 'text=This is how the Arduino listens to the world, waiting to see if a button is pressed or checking the current temperature.
Így figyeli az Arduino a világot, várva, hogy megnyomnak-e egy gombot, vagy ellenőrzi az aktuális hőmérsékletet.';
87.5-93.0 [enter] drawtext reinit 'text=Then we have output pins.Notice how the arrow now flows away from the board to light up a bulb.
Aztán vannak kimeneti lábaink. Figyeld meg, hogyan folyik el a nyíl a paneltől, hogy felgyulladjon egy LED izzó.';
93.5-100.0 [enter] drawtext reinit 'text=This is how the Arduino commands the world, sending out electricity to turn on a light or spin a motor.
y irányítja az Arduino a világot, elektromosságot küldve egy LED lámpa felkapcsolásához vagy egy motor megforgatásához.';
100.5-103.0 [enter] drawtext reinit 'text=To use these pins, the Arduino speaks two different languages.
Ezen lábak használatához az Arduino két különböző nyelven beszél.';
103.5-105.0 [enter] drawtext reinit 'text=The first is digital. A digital signal is either entirely on or entirely off. It works.
Az első a digitális. A digitális jel vagy teljesen be van kapcsolva, vagy teljesen ki van kapcsolva. Működik.';
105.5-111.0 [enter] drawtext reinit 'text=It works like the standard LED light switch on your wall.
Úgy működik, mint egy hagyományos fali villanykapcsoló.';
111.5-113.0 [enter] drawtext reinit 'text=The second language is analog.
A második nyelv analóg.';
113.5-119.0 [enter] drawtext reinit 'text=Instead of just on or off, analog deals with a continuous range of values
A csak be- vagy kikapcsolás helyett az analóg folytonos értéktartományokkal működik.';
119.5-126.0 [enter] drawtext reinit 'text=functions like a sliding dimmer switch, where you can set a light to 10\\%, 50\\%, or anywhere in between.
úgy működik, mint egy tolókapcsoló, amellyel a lámpát 10\\%, 50\\% vagy a kettő közötti értékre állíthatja be.';
126.5-129.0 [enter] drawtext reinit 'text=These pins are the foundation.
Ezek a lábak alkotják az alapot.';
129.5-135.0 [enter] drawtext reinit 'text=how they handle signals, you have the interface to send data and receive a physical response.
hogyan kezelik a jeleket, rendelkezésedre áll az interfész az adatok küldéséhez és a fizikai válasz fogadásához.'; 
135.5-140.0 [enter] drawtext reinit 'text=To write our sheet music, we use a free program called the Arduino
A kottákat egy ingyenesen letölthető Arduino nevű programmal írjuk.';
140.5-148.0 [enter] drawtext reinit 'text=IDE. The language we type into it is a simplified version of C++. A single program for the Arduino is called a sketch.
IDE. A programozási nyelv, amit belegépelünk, a C++ egy egyszerűsített változata. Egyetlen Arduino-programot vázlatnak nevezünk.';
148.5-151.0 [enter] drawtext reinit 'text=To make a program work, you need to use the code "skech" to make a sketch work.
Ahhoz, hogy egy program működjön, a "skech" kódot kell használnod a vázlat működéséhez.';
151.5-156.0 [enter] drawtext reinit 'text=you only need to understand two main sections, the setup and the loop. Here is the setup block.
Csak két fő részt kell megértened, a beállítást és a ciklust. Itt található a beállítási blokk.';
156.5-161.0 [enter] drawtext reinit 'text=Any instructions you put in here will run exactly one time.when the board turns on.
Az ide beírt utasítások pontosan egyszer fognak lefutni, amikor a kártya bekapcsol.';
161.5-167.0 [enter] drawtext reinit 'text=This is where you organize the stage, like telling the Arduino  that pin #13 will be an output.
Itt szervezed meg a "színpadot", például mondd meg az Arduinónak, hogy a 13-as láb kimenet lesz.';
167.5-170.0 [enter] drawtext reinit 'text=Once the setup is done, the program moves to the loop.
Miután a beállítás megtörtént, a program a ciklusba lép.';
170.5-174.0 [enter] drawtext reinit 'text=As you can see by this circular path, this is the actual performance.
Amint ezt a körkörös utat is láthatjuk, ez a tényleges teljesítmény.';
174.5-180.0 [enter] drawtext reinit 'text=Any instructions placed inside the loop will repeat over and over again until the power is complete.
A hurok belsejében elhelyezett utasítások újra és újra megismétlődnek, amíg az áramellátás be nem fejeződik.';
180.5-189.0 [enter] drawtext reinit 'text=To make a light blink, we place an instruction inside the loop telling the board to send electricity to pin 13 to turn the light on.
Ahhoz, hogy egy LED villogjon, egy utasítást helyezünk el a hurokban, amely arra utasítja a kártyát, hogy küldjön áramot a 13-as lábra a lámpa bekapcsolásához.';
189.5-195.0 [enter] drawtext reinit 'text=Next,we`ll use the power supply to turn the light on. we tell the board to wait for one second,then tell it to turn the light off and wait one more second.
Ezután a tápegységet használjuk a lámpa felkapcsolásához. Megmondjuk a kártyának, hogy várjon egy másodpercet, majd azt, hogy kapcsolja ki a lámpát, és várjon még egy másodpercet.';
195.5-202.0 [enter] drawtext reinit 'text=After that last step,the loop simply starts right back at the top. and the light comes on again.
Az utolsó lépés után a hurok egyszerűen újraindul felülről. és a lámpa újra kigyullad.';
202.5-208.0 [enter] drawtext reinit 'text=Coding in Arduino is simply about giving your conductor a list of clear chronological instructions to follow forever.
Az Arduinóban való kódolás lényege, hogy a karmesternek világos, kronológiai utasításokat adunk, amelyeket örökre követnie kell.';
208.5-212.0 [enter] drawtext reinit 'text=With the code we have written, you click the upload button on your computer.
Az általunk írt programkóddal rákattint a számítógépén található feltöltés gombra.';
212.5-217.0 [enter] drawtext reinit 'text=The instructions travel down a USB cable and are stored directly in the Arduino`s brain.
Az utasítások egy USB-kábelen haladnak keresztül, és közvetlenül az Arduino flash memóriájában tárolódnak.';
217.5-219.0 [enter] drawtext reinit 'text=The second that upload finishes--
Abban a pillanatban, amikor a feltöltés véget ér...';
219.5-227.0 [enter] drawtext reinit 'text=the board springs to life, and the tiny built-in light on the board starts to flash on and off, keeping the exact rhythm of your code.
A kártya életre kel, és a beépített apró lámpa villogni kezd, pontosan a programkódod ritmusát követve.';
227.5-235.0 [enter] drawtext reinit 'text=To build larger projects, you connect the Arduino to external components using jumper wires and a breadboard.
Nagyobb projektek építéséhez az Arduinót külső alkatrészekhez kell csatlakoztatni jumper vezetékek és egy próba kártya segítségével.';
235.5-240.0 [enter] drawtext reinit 'text=This grid makes it easy to plug in larger lights, motors, and buzzers to your pins.
Ez a rács megkönnyíti nagyobb lámpák, motorok és hangjelzők csatlakoztatását a csatlakozókhoz.';
240.5-243.0 [enter] drawtext reinit 'text=That reaction speed game from earlier works the same way.
A korábbi reakciósebesség-játék ugyanígy működik.';
243.5-250.0 [enter] drawtext reinit 'text=It reads an input from a player`s button, waits for the code to process the timing, and then triggers an output to ring the code. a buzzer.
Beolvassa a játékos gombjáról érkező bemenetet, megvárja, amíg a kód feldolgozza az időzítést, majd aktivál egy kimenetet, amely megcsengeti a kódot. Ez egy berregő.';
250.5-254.0 [enter] drawtext reinit 'text=Building custom electronics doesn`t require an engineering degree.
Egyedi elektronikai eszközök építéséhez nem szükséges mérnöki diploma.';
254.5-260.0 [enter] drawtext reinit 'text=All it takes is a basic starter kit, a digital conductor, and the curiosity to tell it what to do.
Csupán egy alapvető kezdőkészletre, egy digitális vezetőre és a kíváncsiságra van szükség, hogy megmondjuk, mit kell tennie.';
260.5-265.0 [enter] drawtext reinit 'text=next ...
következő ...';
270.0 [enter] drawtext reinit 'text=';

5.) videó stream egyes képeire ráhelyezi a sendcmd.txt fájl tartamát
két sorban, felső sor az angol az alatta lévő magyar szöveg lesz.
TextSendcmd.bat:

..\\..\\2026-07-09-full\\bin\ffmpeg -y -i ArduinoBasicsforBeginnersBreadboardLEDBuzzerServoLogo.mkv ^
-vf sendcmd=f=sendcmd.txt,drawtext=fontfile=LiberationMono-Regular.ttf:fontsize=20:fontcolor=white@1.0:box=1:boxcolor=black@1.0:boxborderw=4:line_spacing=-5:text='':enable='between(t,0,600)' ^
ArduinoBasicsforBeginnersBreadboardLEDBuzzerServoLogoText2.mkv

Eredményt a ArduinoBasicsforBeginnersBreadboardLEDBuzzerServoLogoText2.mkv videó fájt elindítom a VCL médialejátszóval:
videolan
Vége.

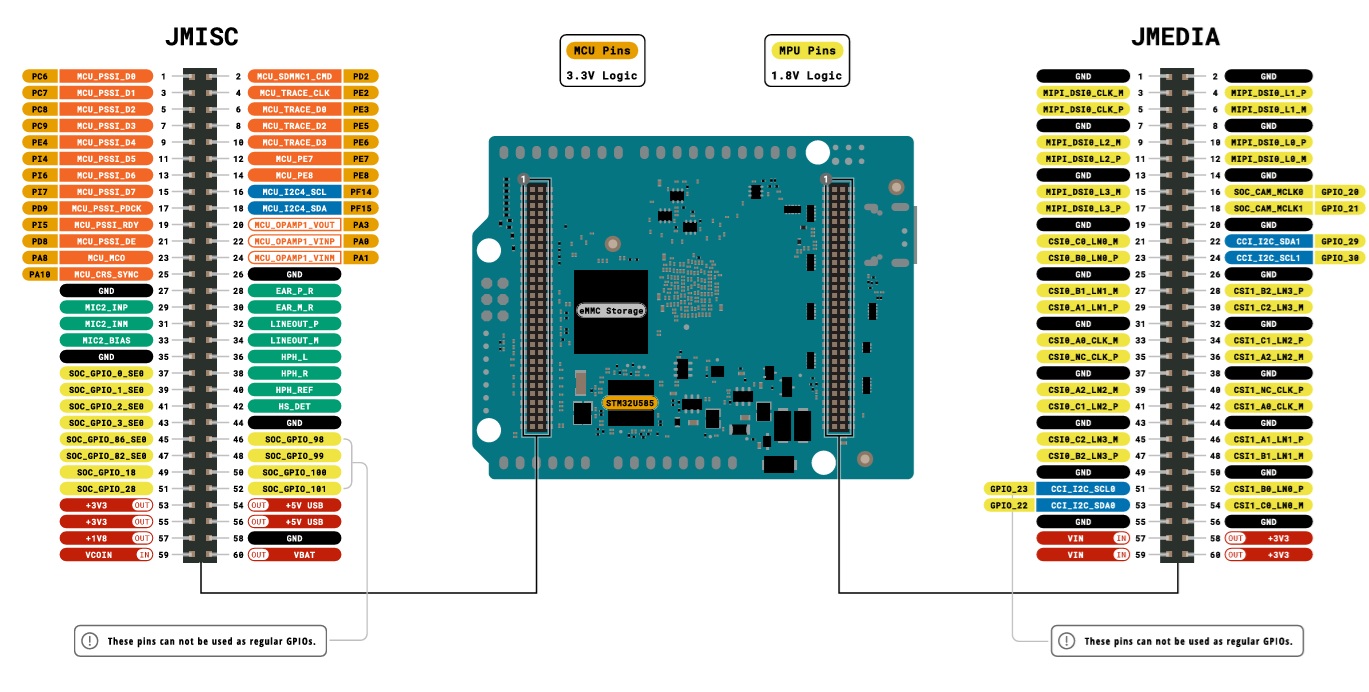
Arduino UNO Q

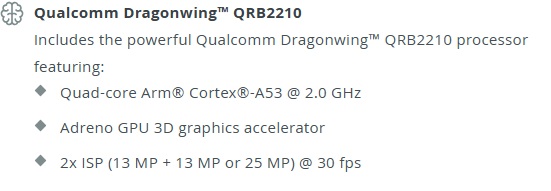
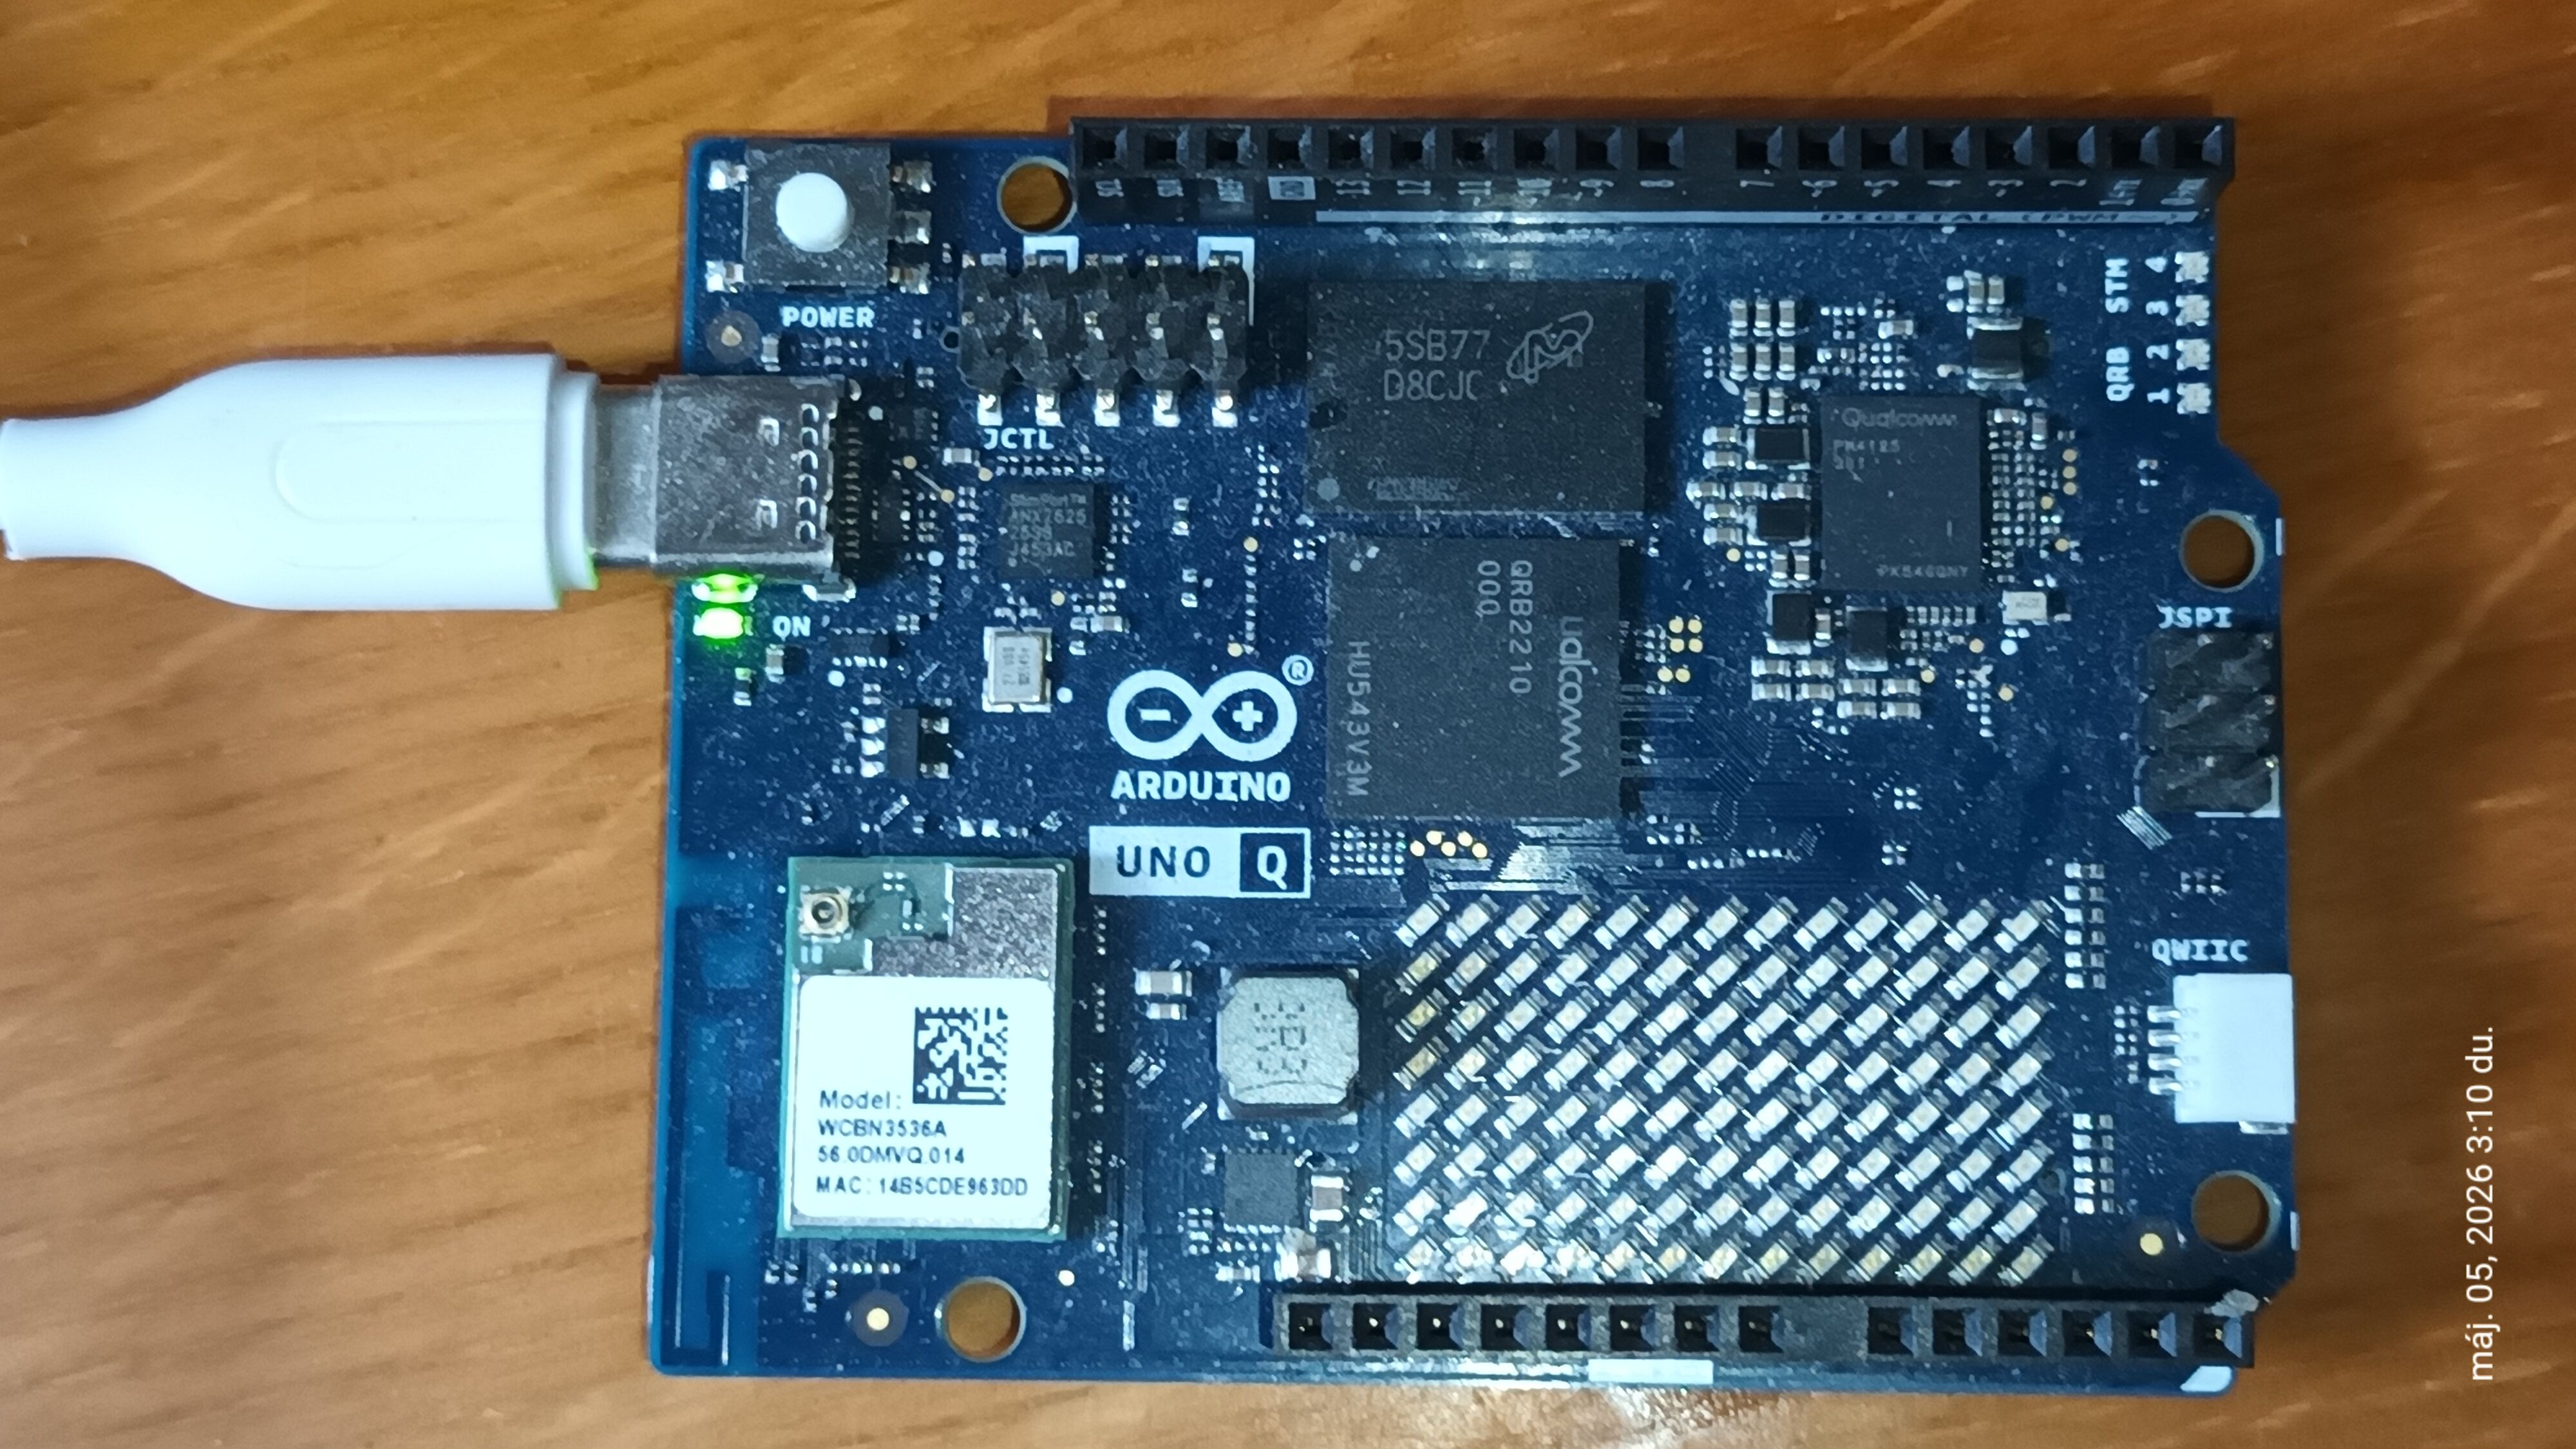
Arduino® UNO Q hardware kártya integrálja Qualcomm® QRB2210 Microprocessort (MPU),
Fut rajta egy teljes Debian-bázisú Linux, linux Debian OS, és
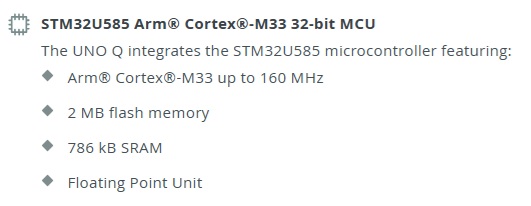
STMicroelectronics® STM32U585 Microcontroller (MCU), beépítve egy Arm® Cortex®-M33 architecture-ába.

unoq1

unoq2

uni3

unikartya

Arduino® UNO Q HW leírás

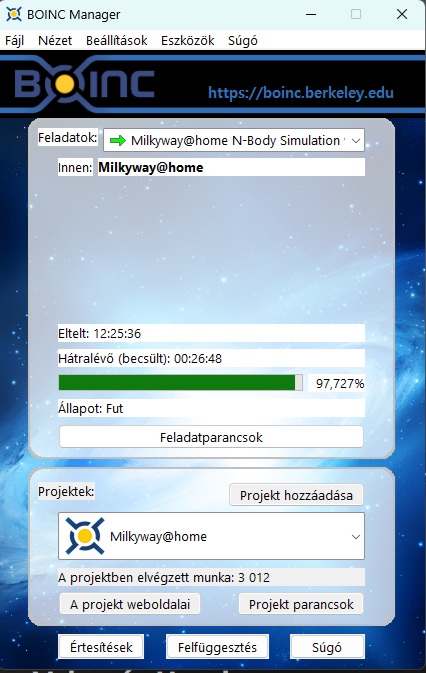
Kutatások segítése BOINC rendszerrel.

A BOINC segítségével számítógép segítségével segítheted a legmodernebb tudományos kutatásokat.
A számítógépen futó BOINC alkalmazás letölti a tudományos számítástechnikai feladatokat, és láthatatlanul futtatja azokat a háttérben.
BOINC
BOINC add-on software
How BOINC works
User manual
Én windows 11-re és Raspberry pi 5 (Rpbb5)) debián linuxra raktam fel.
Windows 11:

Milkyway@Home

Milkyway project

Milkyway

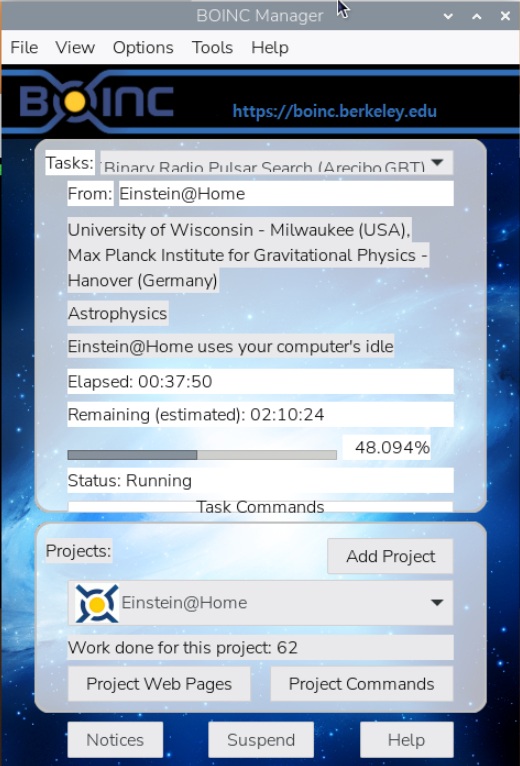
Raspberry pi 5 (Rpbb5)) debián linux:
Debian and Ubuntu install
Einstein@Home

Einstein project

Einstein

SETI@home projekt is hozzáadható a BOINC rendszerhez:
SETI

Mp4 formátumú videó angol szöveg hang text szövegre konvertálása ffmpeg programmal

FFmpeg logo
STT (Speech To Text)
FFmpeg windows változatú program letőltése innen:
FFmpeg letöltés
FFmpeg honlap
FFmpeg filter leírás
Whisper nyelvi AI modelleket használhatjuk. Get the OpenAI Whisper models.
A legjobb persze az angol nyelvű, de van számtalan nyelvre, magyar (HU), de nem a legjobb. Én az angolt választottam (EN), abból van a legtöbb videó pl fílmek, majd ha nem tudsz jól angolul a Google Fordítóval a szöveget lefordíthatod magyarra.
Windows OS-re kell "win-bash"
win-bash
whisper OpenAI

git clone https://github.com/ggml-org/whisper.cpp
cd whisper.cpp
cd models
sh download-ggml-model.sh base.en
sh download-ggml-model.sh small.en
sh download-vad-model.sh silero-v6.2.0

Letöltöttem egy teszt mp4 videó fájlt, neve: "popeye_meets_sinbad.mp4"
"speechToTxt_popey.bat":

c:\Users\HP\work\Python\apps\TextWritingToVideoAndSpeech\tests\ffmpeg-2025-12-22/bin/ffmpeg -i popeye_meets_sinbad.mp4 -vn -filter:a "whisper=model='c\:\\Users\\HP\\work\\Python\\apps\\SpeechToText\\whisper.cpp\\models\\ggml-small.en.bin':language=en:queue=30:format=text:destination=PopeyEnglish.txt" -f null -

Eredmény:
"PopeyEnglish.txt"

Hey, I want to make oil.Oh yeah?Yeah.Who are you?I'm popped by the sailor man.Who are you?Who am I?You heard what I said.Who am I?That's what I said.Why?Why?Who's the most remarkable, extra ordinary fellow?You!This is what you do.[MUSIC PLAYING]Special kind of fellow

Hibátlan!

Szöveg írás mp4 formátumú videóra ffmpeg programmal

FFmpeg logo
FFmpeg windows változatú program letőltése innen:
FFmpeg letöltés
FFmpeg honlap
FFmpeg filter leírás
Letöltöttem egy velencei teszt fájlt, neve:
"venice.mp4"
"c:\Windows\Fonts\Calibri.ttf" másoltam a test könytárba, ami nálam:
"c:\Users\HP\work\Python\apps\TextWritingToVideo\tests\" másnál más és más.
"buekTXT.cmd " fájlt:

0.0-10.0 [enter] drawtext reinit 'text=Boldog Újevet Kívánok:x=(w-text_w)/2:y=9*(h-text_h)/10-40:fontcolor=white';  
10.0-15.0 [enter] drawtext reinit 'text=Magamnak, és Mindenkinek:x=(w-text_w)/2:y=6*(h-text_h)/10:fontcolor=yellow';
15.0-20.0 drawtext reinit 'text=és a Hülyéknek!:x=(w-text_w)/2:y=6*(h-text_h)/10-20:fontcolor=Cyan';
20.0 drawtext reinit 'text=BUÉK 2026!:x=(w-text_w)/2:y=9*(h-text_h)/10-80:fontcolor=Gold:fontsize=96';

Készítettem egy windows batch fájlt, neve:
"sendcmdBUEK.bat":

c:\Users\HP\work\Python\apps\TextWritingToVideo\tests\ffmpeg-2025-12-22/bin/ffmpeg -stream_loop 1 -i Venice.mp4 -filter_complex "sendcmd=f=buekTXT.cmd,drawtext=text='':fontfile=calibri.ttf:fontcolor=white:fontsize=64" Venice_BUEK.mp4

Eredmény videó fájl:
"Venice_BUEK.mp4"

MariaDB Linuxon

MySQL adatbázis teljesen free változata.

MariaDB

Verzió 10.11.13-MariaDB-ubuntu-0.24.04. adatbázis.
Installing MariaDB Server

sudo apt update
sudo apt install mariadb-server mariadb-client
sudo mariadb-secure-installation
sudo systemctl status mariadb

jelszó:

mariadb -h localhost -u root -p
Enter password: <password>
SELECT VERSION(), CURRENT_DATE;
CREATE DATABASE  <database>;
sudo systemctl status mariadb
sudo mysqladmin version

Fontos könyvtárak, fájlok:
/etc/mysql/conf.d/mysql.conf
/etc/mysql/conf.d/mysql.conf/mysql.conf
/var/run/mysqld
Parancsok, start,stop, restart.

sudo systemctl start mariadb
sudo systemctl stop mariadb
sudo systemctl restart mariadb

A -hoz létrehozása:

sudo mariadb
// localhost
mariaDB>CREAT USER '<user1>'@'localhost' IDENTIFIED WITH 'mysql_native_password' BY '<passworduser1>';
mariaDB>FLUSH PRIVILEGES;
// for all IP.
mariaDB>CREAT USER '<user1>'@'%' IDENTIFIED WITH 'mysql_native_password' BY '<passworduser1>';
mariaDB>FLUSH PRIVILEGES;

Userek megnézése és kilépés:

mariaDB>select user from mysql.user;
mariaDB>exit

Távoli (remote server) elérés:
How to enable Remote access to your MariaDB
Ellenőrzés:

ps -ef | grep -i mysql
// ezt kapjuk vissza:
mysql        595       1  0 04:17 ?        00:00:00 /usr/sbin/mysqld
root        1350    1337  0 04:22 pts/0    00:00:00 grep --color=auto -i mysql

Alapállapotban localhost-on listening-en fut.

netstat -ant | grep 3306
// ezt kapjuk vissza:
tcp        0      0 127.0.0.1:3306          0.0.0.0:*               LISTEN

Megnyitunk egy text szerkesztőt, így nano/mc/vim stb.:

nano /etc/mysql/my.cnf
vagy
sudo nano /etc/mysql/mariadb.conf.d/50-server.cnf

Megváltoztatjuk a bind-address-t 127.0.0.1 -ról 0.0.0.0 -ra:

bind-address = 0.0.0.0

Majd, ha ezzel elkészütünk, MariaDB restart-oljuk, és megnézzük a bind-adress-t:

sudo systemctl restart mariadb
netstat -ant | grep 3306
// ezt kapjuk vissza:
tcp        0      0 0.0.0.0:3306            0.0.0.0:*               LISTEN

Grant Access to a User from a Remote System:
If you want to grant access to all remote IP addresses on wpdb as wpuser, use % instead of IP address as shown below:

MariaDB > GRANT ALL ON <database>* to <user1>'@'%' IDENTIFIED BY <'password>' WITH GRANT OPTION;

Karakterkészlet berakása az adtabázisba:

MariaDB > SHOW COLLATION LIKE 'latin2%';
MariaDB > SHOW COLLATION LIKE 'utf8mb4_unicode_%';
mariaDB > exit

Tűzfal Firewall konfigurálása:

sudo ufw allow from <IP address> to any port 3306
sudo ufw allow 3306
sudo ufw reload

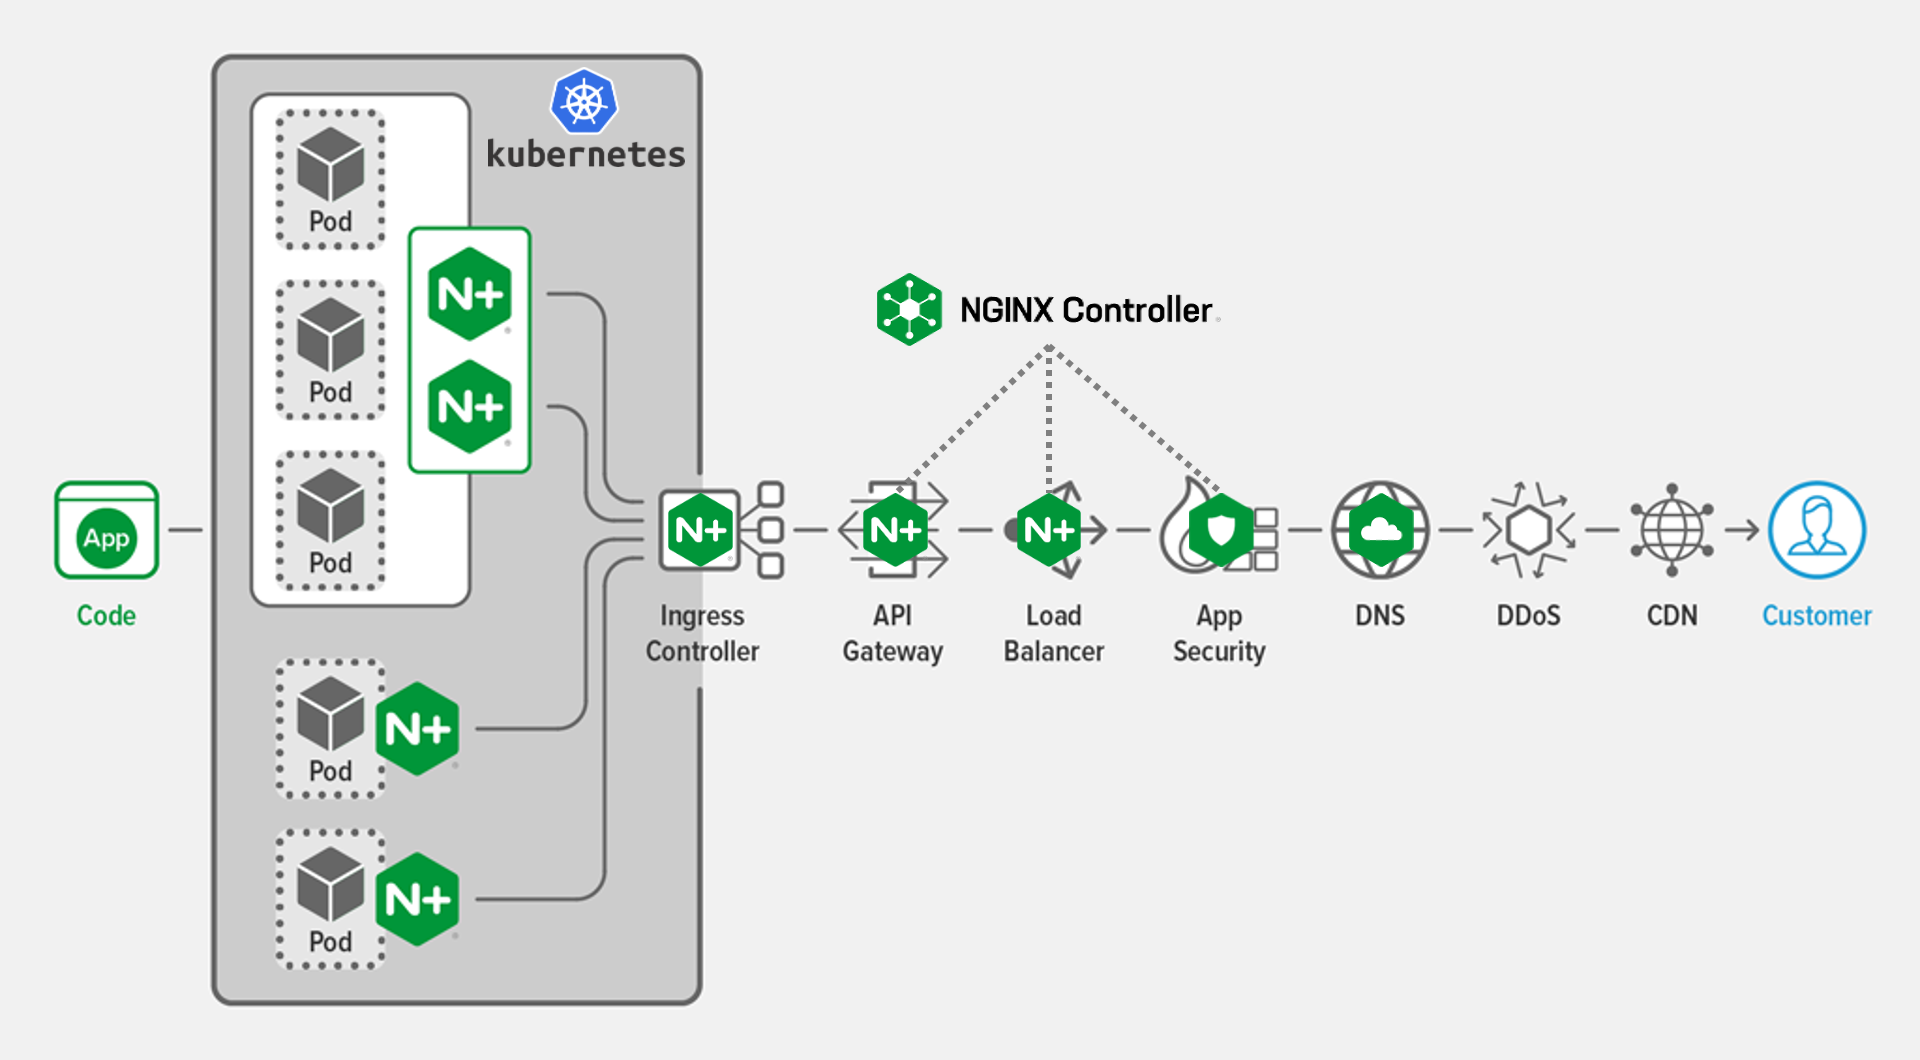
Nginx és Nginx Plus webszerver konigurálása Linuxon.

Linuxon két webszerver program terjedt el, apache és az újabb a nginx.
NGINX
Configuring NGINX and NGINX Plus as a Web Server NGINXPlus Én mindkettőt használom, most az nginx webszerver konigurálását mutatom be a linuxon.
Mindkettő használható a Windows operációs rendszer alatt is.
Új programok installálása elött ajánlott frissíteni a linux rendszert.

sudo apt update
sudo apt full-upgrade

Jön az nginx program intallálása.

sudo apt-get install nginx

Konigurációhoz használt file-ok.

/etc/nginx/nginx.conf
/etc/nginx/sites-avaliable/foodsdbcibus.eu
/etc/nginx/sites-enabled/@foodsdbcibus.eu  // link
/etc/nginx/snippets/self-signed.conf
/etc/ssl/certs/nginx.cert  // ssl
/etc/ssl/private/nginx.key // ssl
/etc/nginx/dhparam.pem //ssl

parancsok:

sudo systemctl stop nginx 
sudo systemctl start nginx 
sudo systemctl restart nginx 
sudo nginx -t   // nginx.conf helyességét megnézi
sudo systemctl reload nginx 
sudo systemctl disable nginx 
sudo systemctl enable nginx 
sudo  systemctl status nginx.service 

Regisztráltam a VPS Linux szerveremhez egy host nevet: foodsdbcibus.eu
/etc/hostname tartalma:

foodsdbcibus.eu

/etc/resolv.conf:

nameserver 81.0.107.10
nameserver 1.1.1.1

Konfigurációs fájl tartalma: /etc/nginx/nginx.conf :

user www-data;
worker_processes auto;
pid /run/nginx.pid;
error_log /var/log/nginx/error.log;
include /etc/nginx/modules-enabled/*.conf;

events {
    worker_connections 768;
    # multi_accept on;
}

http {
    client_header_timeout  3m;
        client_body_timeout    3m;
        send_timeout           3m;

        client_header_buffer_size    1k;
        large_client_header_buffers  4 4k;

        gzip on;
        gzip_min_length  1100;
        gzip_buffers     4 8k;
        gzip_types       text/plain;

        output_buffers   1 32k;
        postpone_output  1460;

        sendfile         on;
        tcp_nopush       on;
        tcp_nodelay      on;

        keepalive_timeout  75 20;

    ssl_session_cache   shared:SSL:10m;
        ssl_session_timeout 10m;

    types_hash_max_size 2048;

    # server_tokens off;

    # server_names_hash_bucket_size 64;
    # server_name_in_redirect off;

    include /etc/nginx/mime.types;
    default_type application/octet-stream;

    ##
    # SSL Settings
    ##

    ssl_protocols TLSv1 TLSv1.1 TLSv1.2 TLSv1.3; # Dropping SSLv3, ref: POODLE
    ssl_prefer_server_ciphers on;

    ##
    # Logging Settings
    ##

    access_log /var/log/nginx/access.log;

    ##
    # Gzip Settings
    ##  

    # gzip_vary on;
    # gzip_proxied any;
    # gzip_comp_level 6;
    # gzip_buffers 16 8k;
    # gzip_http_version 1.1;
    # gzip_types text/plain text/css application/json application/javascript text/xml application/xml application/xml+rss text/javascript;
    ##
    # Virtual Host Configs
    ##

    include /etc/nginx/conf.d/*.conf;
    include /etc/nginx/sites-enabled/*;
}


#mail {
#   # See sample authentication script at:
#   # http://wiki.nginx.org/ImapAuthenticateWithApachePhpScript
#
#   # auth_http localhost/auth.php;
#   # pop3_capabilities "TOP" "USER";
#   # imap_capabilities "IMAP4rev1" "UIDPLUS";
#
#   server {
#       listen     localhost:110;
#       protocol   pop3;
#       proxy      on;
#   }
#
#   server {
#       listen     localhost:143;
#       protocol   imap;
#       proxy      on;
#   }
#}

/etc/nginx/sites-available/foodsdbcibus.eu tartalma:

server {  
#   listen 80 default_server;           
    listen 443 ssl;
    listen [::]:443 ssl;
        server_name foodsdbcibus.eu www.foodsdbcibus.eu;
 #  server_name 192.168.1.10;
        client_max_body_size 64M;
    include /etc/nginx/snippets/self-signed.conf;
        keepalive_timeout   70;

    access_log   /var/log/nginx.access_log;

#       root /var/www/foodsdbcibus.eu;  
    root /home/cibus/public_html/foodsdbcibus.eu;
        index index.php index.html index;

    location /barmi {
            proxy_set_header Host $host;
            proxy_pass http://127.0.0.1:3001;
            proxy_http_version 1.1;
            proxy_set_header Upgrade $http_upgrade;
            proxy_set_header Connection "upgrade";  
        proxy_cache_bypass $http_upgrade;
            proxy_set_header X-Forwarded-For $remote_addr;
            proxy_set_header X-Real-IP $remote_addr;
            proxy_connect_timeout 60s;
            proxy_send_timeout 60s;
            proxy_read_timeout 60s;
            proxy_next_upstream error timeout;
        }

    location /testdbnode {
       #    proxy_set_header X-Forwarded-For $proxy_add_x_forwarded_for;
            proxy_set_header Host $host;
            proxy_pass http://127.0.0.1:3000;
            proxy_http_version 1.1;
            proxy_set_header Upgrade $http_upgrade;
            proxy_set_header Connection "upgrade";  
        proxy_cache_bypass $http_upgrade;
            proxy_set_header X-Forwarded-For $remote_addr;
            proxy_set_header X-Real-IP $remote_addr;
            proxy_connect_timeout 60s;
            proxy_send_timeout 60s;
            proxy_read_timeout 60s;
            proxy_next_upstream error timeout;
        }

#       location / {
#           try_files $uri $uri/ =404;
#       }

    error_page  404  /404_1.html;

    location = /404_1.html {
                root  /spool/www;
        }

        location ~ \.php$ {
            include snippets/fastcgi-php.conf;
            fastcgi_pass unix:/var/run/php/php8.3-fpm.sock;
            fastcgi_param SCRIPT_FILENAME $document_root$fastcgi_script_name;
            include fastcgi_params;
        }
    location ~* ^/foodsdbcibus/images/(.+\.(jpg|jpeg|png|ico|webp))$ {        
        root /home/cibus/images;    
        expires      30d;
    }

        location ~* \.(jpg|jpeg|gif)$ {
                root         /spool/www;
                access_log   off;
                expires      30d;
        }       

    location ~* ^/phpmyadmin/(.+\.(jpg|jpeg|gif|css|png|js|ico|html|xml|txt))$ {        
        root /usr/share/;    
    }
    location /phpinfo { 
#       root /var/www/foodsdbcibus.eu/phpinfo; 
#       root /home/cibus/public_html/foodsdbcibus/eu/phpinfo;
        alias /home/cibus/public_html/phpinfo;
        index index.php;
        try_files $uri $uri/ /index.php; 
#       location ~ \.php$ { 
#           include snippets/fastcgi-php.conf; 
#           fastcgi_pass unix:/var/run/php/php8.3-fpm.sock; 
#           include fastcgi_params;           
#           fastcgi_param SCRIPT_FILENAME $request_filename;           
#           fastcgi_param SCRIPT_NAME $fastcgi_script_name;
#       } 
    }
    location /test1 { 
        alias /home/cibus/public_html/test1;
    }
    location /viewdb {
        alias /home/cibus/public_html/viewdb;
    }
    location /devdjango1 {
        alias /home/ptiszai/Public/devdjango1;   
    }
}

server {
   listen 80;
    #listen [::]:80;
    server_name foodsdbcibus.eu www.foodsdbcibus.eu;
    #location / {
   #     proxy_set_header X-Forwarded-For $proxy_add_x_forwarded_for;
   #     proxy_set_header Host $host;
   #     proxy_pass http://127.0.0.1:3000;
   #     proxy_http_version 1.1;
   #     proxy_set_header Upgrade $http_upgrade;
   #     proxy_set_header Connection "upgrade";
    #}
    return 301 https://$server_name$request_uri;
}

SSL titkosítás konfigurációja.
Mi az SSL /TLS Bizonyítvány?
Két lehetőség lehet a web oldal titkosítására, az első magad készíted el a tanúsítványt, de akkor minden browserbe fel kell tölteni a public kulcsot, vagy hivatalos oldalról töltse be azt, de azok pénzbe kerülnek, ilyenkor a browserekbe automatikusan letöltődnek, és az oldalt hitelesítik.
Manuálisan le kell tölteni, és installálni a web szerverre az openssl programot:
Az openssl csomag letöltése és installálása:

sudo apt-get install openssl

Ezzel nem foglalkozom továbbiakban, mert bonyolult, és a felhasználó nem fogja a browserébe installálni az elkészült tanúsítványt.
Én is megvettem a tanúsítványt.
Neve :
RapidSSL® Certificate
Itthon is megvehető forintért web hostingoknál.
A Rapid SSL tanúsítvány ára 1 évre nettó 9000 Ft volt. (Versanus)
Megvásárlása után emailben kaptam 4 db base64-es text részt, amiből az első kettőt használtam fel az nginx webszerver "/etc/nginx/snippets/self-signed.conf" fájlban.

PRIVATE KEY: neve lett nálam "rapid_key.key"
-----BEGIN RSA PRIVATE KEY----- 
....... base64......
-----END RSA PRIVATE KEY-----
CRT: neve lett nálam "rapid_crt.crt""
-----BEGIN CERTIFICATE-----
....... base64......
-----END CERTIFICATE-----

A két fájlt bemásolom a helyükre.
"rapid_key.key" -> "/etc/ssl/private/rapid_key.key".
"rapid_crt.crt" -> "/etc/ssl/certs/rapid_crt.crt".
A "/etc/nginx/snippets/self-signed.conf" fájlba beraktam.

ssl_certificate /etc/ssl/certs/nginx.crt;
ssl_certificate_key /etc/ssl/private/nginx.key;
ssl_protocols TLSv1.2 TLSv1.3;
ssl_prefer_server_ciphers on;
ssl_ciphers ECDHE-RSA-AES256-GCM-SHA512:DHE-RSA-AES256-GCM-SHA512:ECDHE-RSA-AES256-GCM-SHA384:DHE-RSA-AES256-GCM-SHA384:ECDHE-RSA-AES256-SHA384:TLS_AES_256_GCM_SHA384;
ssl_session_timeout 10m;
ssl_session_cache shared:SSL:10m;
ssl_session_tickets off;
ssl_stapling on;
ssl_stapling_verify on;
resolver 8.8.8.8 8.8.4.4 valid=300s;
resolver_timeout 5s;
add_header X-Frame-Options DENY;
add_header X-Content-Type-Options nosniff;
add_header X-XSS-Protection "1; mode=block";
ssl_dhparam /etc/nginx/dhparam.pem;
ssl_ecdh_curve secp384r1;

Teszteljük a configurációs fájlt:

sudo nginx -t  

Hibát nem jelez, utána restart web szerver:

sudo service nginx restart

PHP telepítése.

sudo apt install php8.3 php8.3-cli php8.3-fpm
php -v
PHP 8.3.6 
sudo apt install php8.3-{mysql,curl,xsl,gd,common,xml,zip,xsl,soap,bcmath,mbstring,gettext,imagick}

PHP helye:
/etc/php/
/var/run/php/

sudo service nginx restart

Sikerült.
Elkészült:
Új honlapom ami SSL/TLS bizonylattal védett :
foodsdbcibus.eu
phpinfo

Windows Display Orientation

Windows Display Orientation Desktop.

Nehézkes a Windows Deaktop esetén a képernyő horizontal / vertical módjának az állítása, ezért készült a program.
Windows .NET Framework 4.8 Instantly flip screen orientation horizontal / vertical with a GUI command.
Because switching between landscape and portrait mode using Display settings on windows takes too many clicks.
Works with multiple monitors and all display orientation modes (landscape, landscape inverted, portrait, portrait inverted).
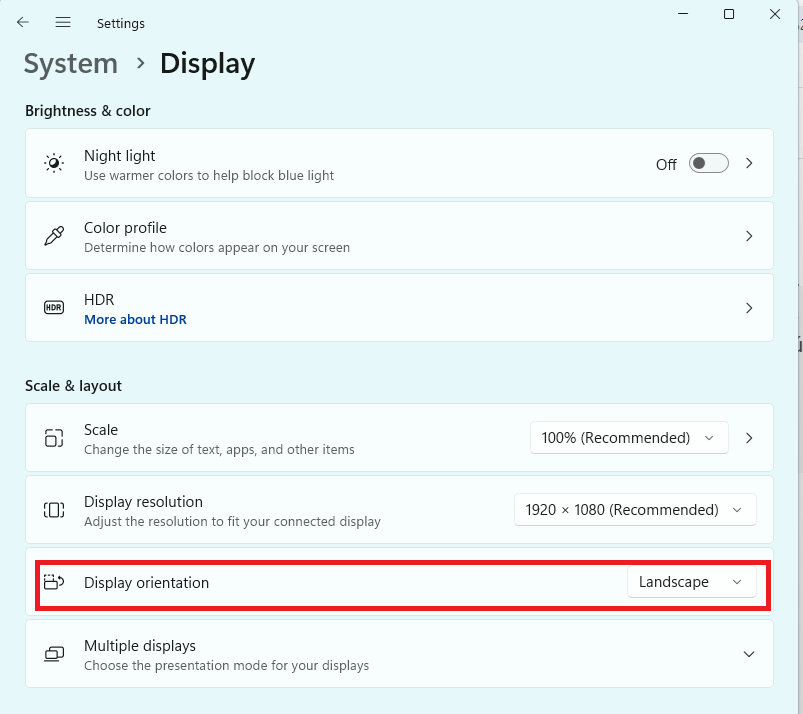
Preview oroginal Windows 11 Desktop -> System -> Display

Display

Program képe:

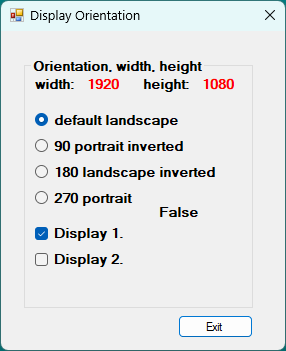
program

4 arguments függvény argumentum kell:
RotateDisplay.cs:

Running(uint deviceID_a, uint rotateMode_a, ref int width_a, ref int height_a) { ... };
  • argument 1 : deviceID_a (0: first main screen, 1: second screen, 2: third etc.)
  • argument 2 : rotateMode_a rotation (0: default landscape, 90: portrait inverted, 180: landscape inverted, 270: portrait)
  • argument 3 : get Width width_a
  • argument 4 : get Height height_a

    hotkeys :
    Billentyűk:
    ESC key : exit
    F2 key : back to default landscape

    .NET Framework 4.8 redistributable :
    NET4.8
    notes :
  • doesn't need to be run as admin
  • rotation can only be set to 4 available values (0, 90, 180, 270), any other value won't work.
  • can't set screen xy position in relation to other screens as possible with Display settings menu.

    Forráskód:
    github
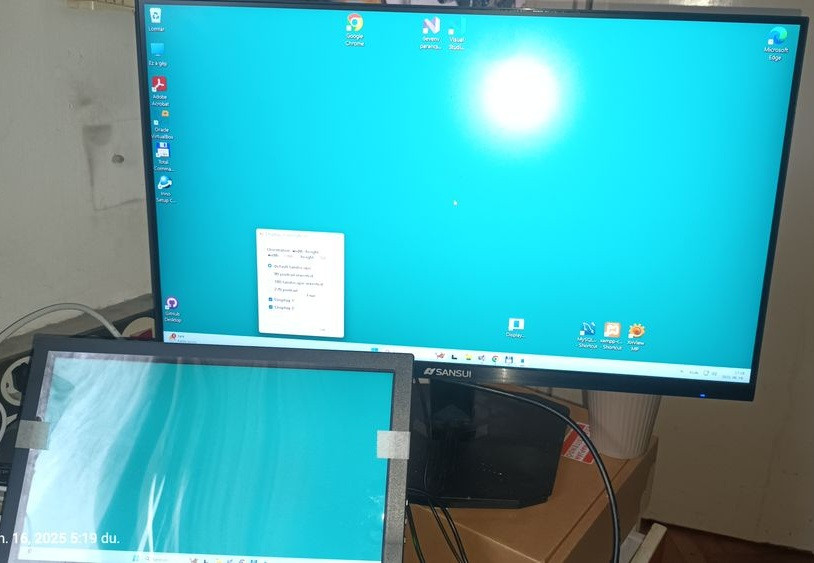
    0 degrees:
    photo1

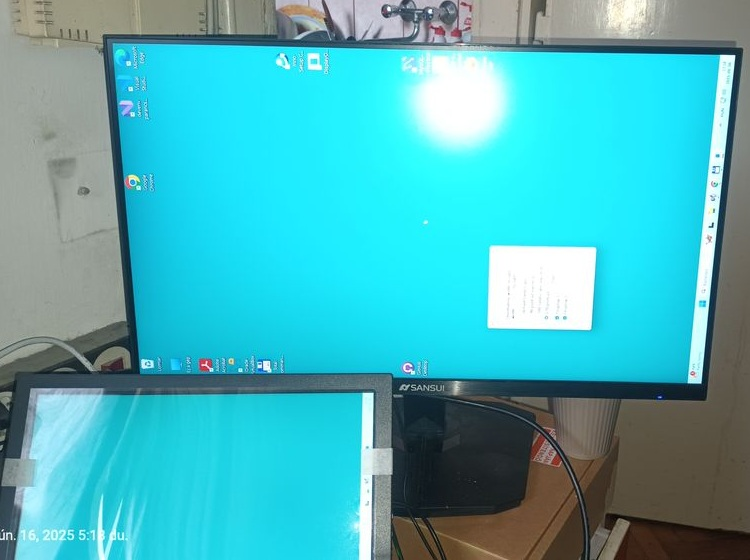
    90 degrees:
    photo2

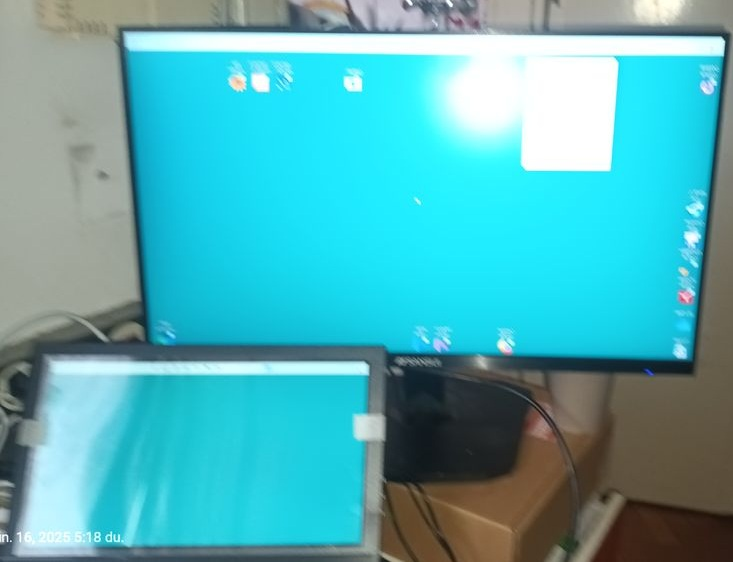
    180 degrees:
    photo3

    270 degrees:
    photo4